
For a knife edge, how sharp is sharp? How do you measure it? How do you define it? Old, late-night infomercials used to hype the ability of the Ginsu knife to cut the tops off of aluminum cans. Is a Ginsu that sharp?
If I have to open a can of soup, I’ll use a can opener. I don’t care if my knife can open a can. I don’t care if I can shave with my chef’s knife or cut a half-inch thick rope with my paring knife. I have other tools for those tasks. For me, sharpness if not an absolute. It is as much a matter of how I use a knife as it is a matter of knife-edge configuration.
What does the edge of a sharp knife look like? I’ve heard many descriptions. Most incorporate some form of teeth along the edge. Is that correct? I’ve wondered about it for a long time, and recently, I finally had a chance to look at some knife edges up (very) close.
I’ve been curious about knife edges for a long time. In 2006, I became acquainted with Mark Henry, the then president and chief designer of Furitechnics USA. His company produced a knife sharpener called the Ozitech. They used a high-magnification photo of a knife edge to promote the sharpener. The image never seemed to match my imagination of what an edge would look like when sharpened on an Ozitech. I wanted some way see those edges up close.
Of course, I’m not the only curious one. A friend of mine, Mike Solaegui, is a professional knife sharpener. His store, Perfect Edge Cutlery & Chefs Supply, sells a wide variety of knives from a variety of manufacturers. Mike is also curious about what the knife edges he produces, as well as those from knife manufacturers, look like.
A little while ago, I was getting reacquainted with a former hiking buddy. During our conversation, he informed me that he had access to a scanning electron microscope (SEM) through his job. He didn’t have to say it twice. I immediately started to talk him into letting Mike and I get some images of knife edges on his fancy machine. It turned out that he also was curious.
That initial meeting was followed by a meeting between the three of us so Mike and I could learn more about the SEM process and how our samples would need to be configured. I knew that the process happened under a vacuum, but I had no appreciation for how small the samples had to be to fit into the microscope. It turned out that each sample had to fit on a stage that had a maximum diameter of 25 mm (1 in). This meant that a knife had to be terminated and a small piece extracted from its edge.
Mike and I took the information and headed to his shop. We created eight different samples, of which six would eventually be imaged. Making the samples involved breaking the knives to create pieces of knife edge that were in the order of 6 to 9 mm (0.24 to 0.35 in) wide.
On the appointed day, my friend mounted the samples with conductive paste, individually or in pairs, on special mounts that could be inserted into a locating hole in the microscope stage. He also operated the SEM—Mike and I had no idea how the thing worked.
The images below are the actual images from the SEM. All the images are lateral views. No attempt was made at this time to look at an edge from an oblique angle. The magnification listed on each image is based on the SEM display monitor. Based on the pixel-level measurements I made of the scale bars in each image, your on-screen magnification, assuming your monitor displays at 72 pixels per inch, will be the listed magnification divided by 128. Other than converting the images to a format that your browser can understand, the images are straight from the SEM.

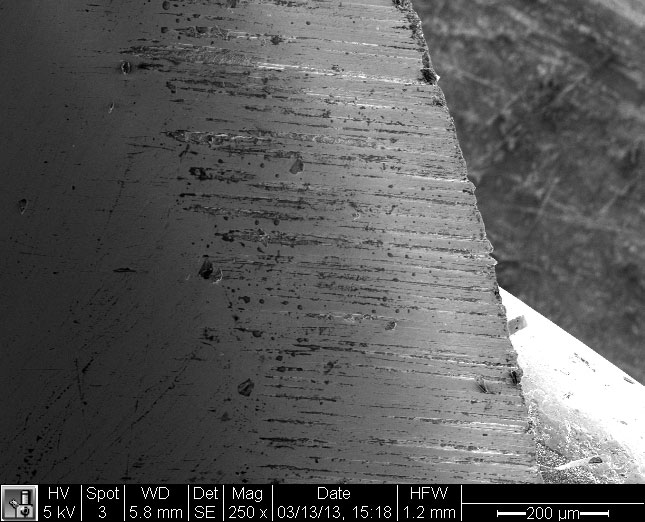
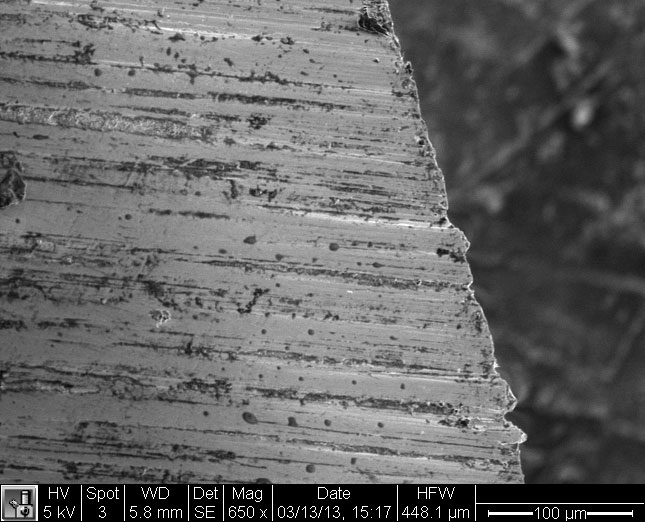
Description: New, out-of-the-box, factory-produced edge on a Victorinox 40715 Fillet Knife.
Comment: The dark spots appear to be voids in the surface of the metal, but they are more likely spots of oil remaining from the manufacturing process. The appear dark because they are not conductive, which is required for imaging with electrons. This is more noticeable in the next set of images at the highest magnification.

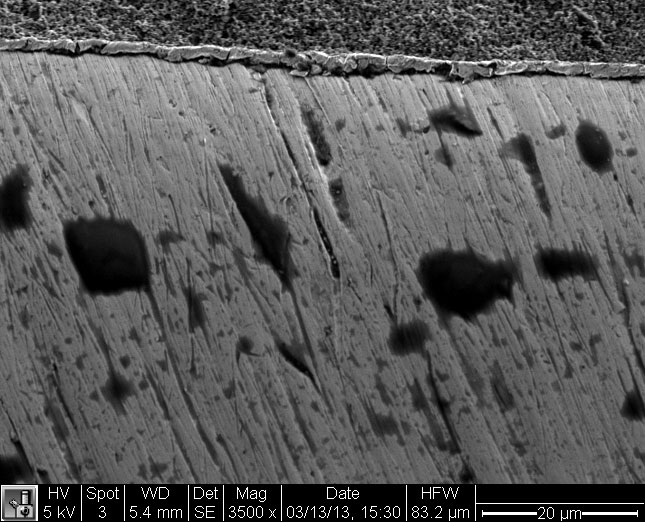
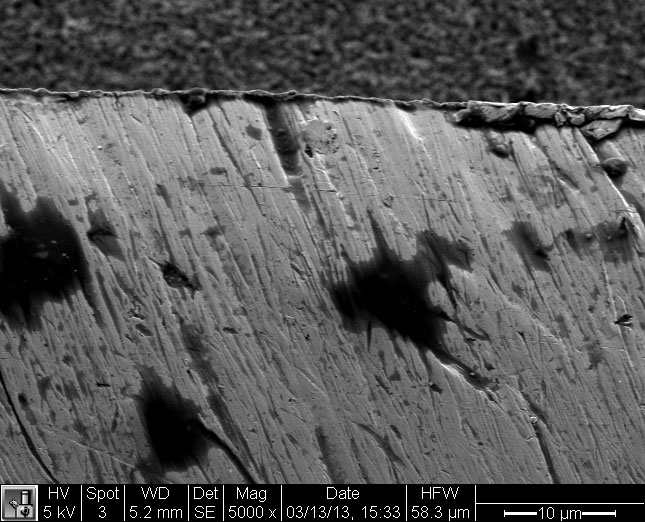
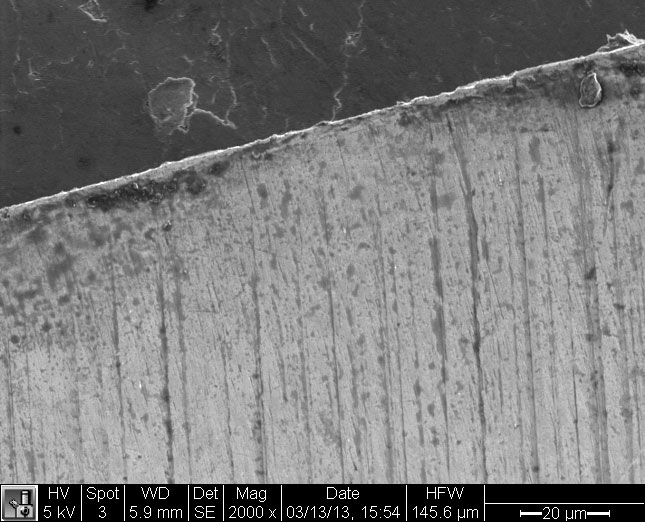
Description: New, out-of-the-box, factory-produced edge on a Victorinox 40715 Fillet Knife, re-sharpened using standard Perfect Edge method.
Comment: In the top image, it is clear that the Perfect Edge method produces a smoother surface than the factory sharpening. It is not known if the burr is a result of the sharpening method or handling. The rolled-over burr appears to be about 0.5 µm wide although in a few places it grows to 2 µm, which is still 10 to 80 times smaller than a human hair.
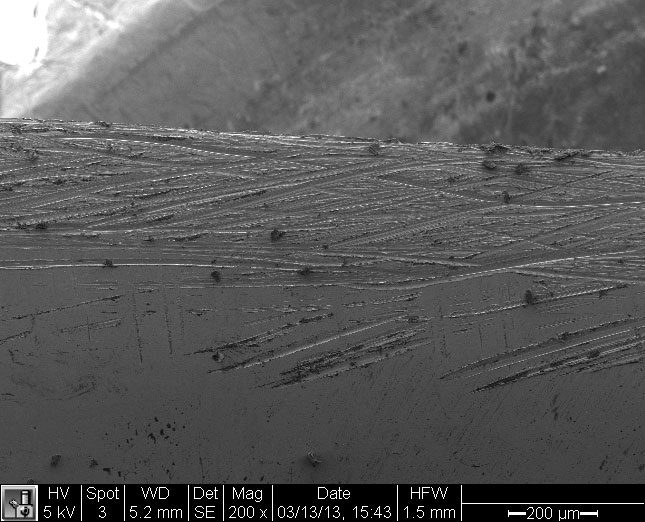
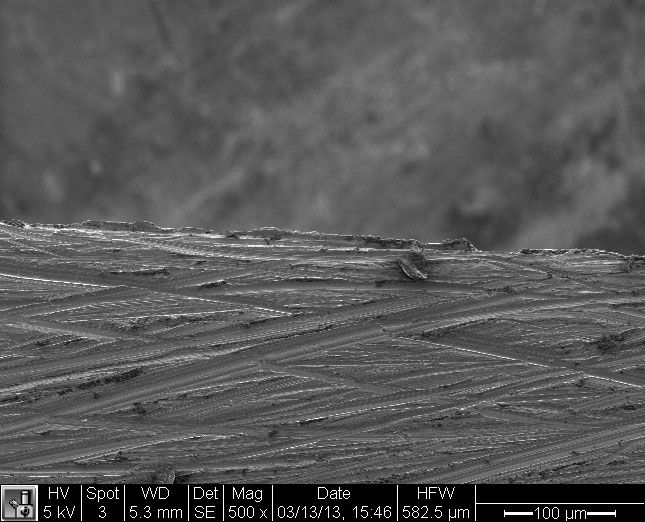

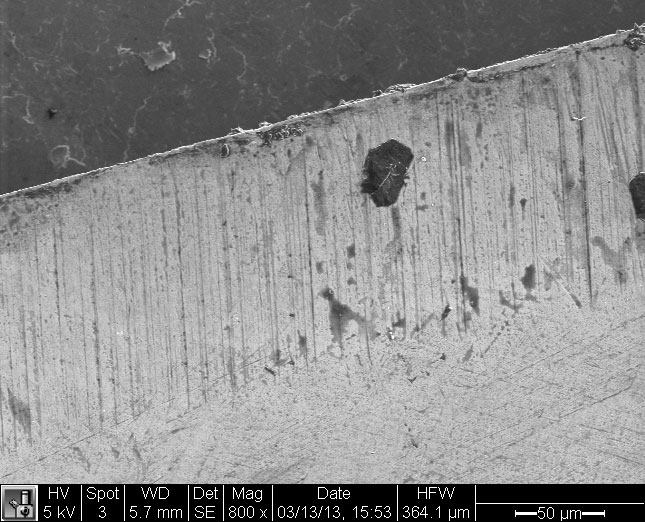
Description: New, out-of-the-box, factory-produced edge on a Victorinox 40715 Fillet Knife, re-sharpened using standard Perfect Edge method, re-sharpened using 5 passes on the Furi FUR626 Ozitech Diamond Fingers Pro Knife Sharpener.
Comment: Even though the knife is drawn through the sharpener parallel to the edge, the most prominent scratches are at an acute angle to the edge. I believed that this is because of varying pressure on the grit-coated “fingers” of the sharpener. The varying pressure causes the set of opposing “fingers’ to open and close and the blade to move in and out. The roughness of the final edge appears similar to the original factory edge.
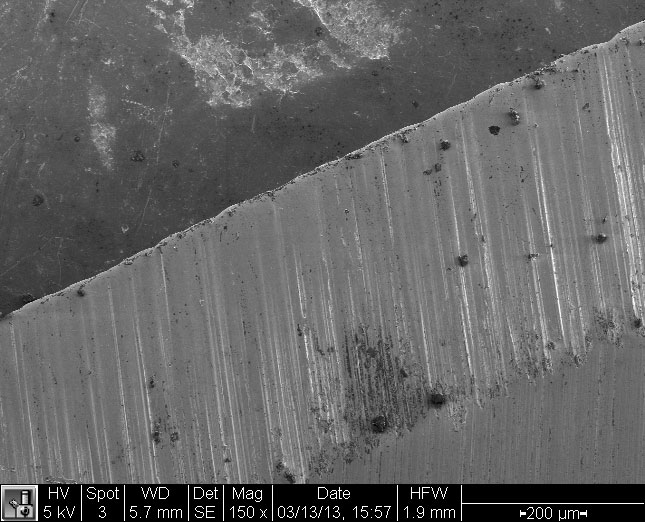
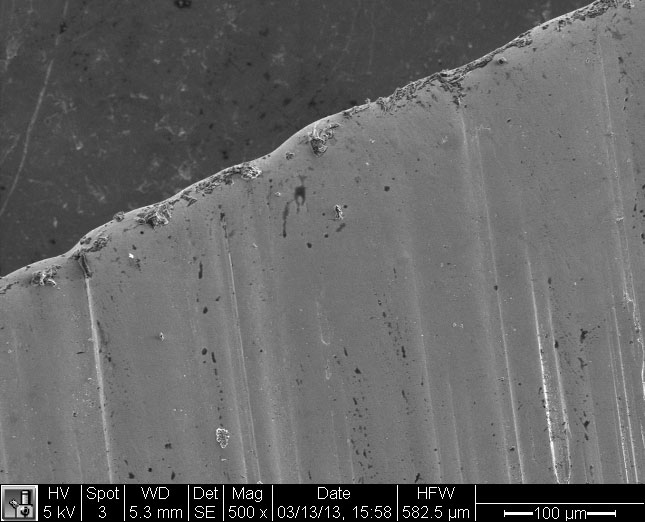

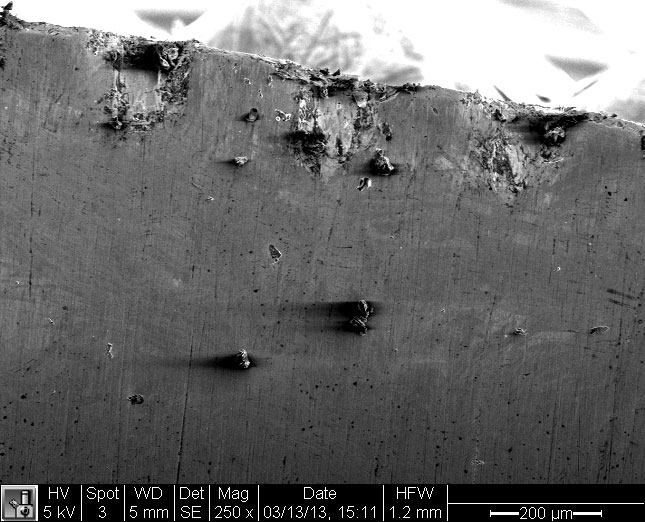
Description: New, out-of-the-box, factory-produced edge on a Cutco 75/8" Petite Chef knife.
Comment: The edge’s bevel is surprisingly smooth, while to the naked eye, it appears quite rough.
Description: Slightly used Shun (Kai) Kagi Prototype.
Comment: Of the complete group of knife edges observed, this edge appeared the smoothest and straightest to both naked vision and under magnification.
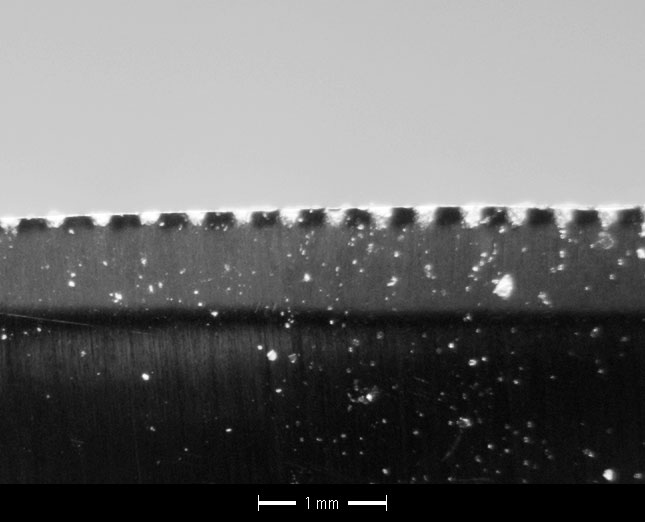
Description: Worn Wüsthof santoku, re-sharpened using standard Perfect Edge method, re-sharpened using a Chantry “Retro” Sharpener.
Comment: To the naked eye, the edge appears to be toothed, but even with an ordinary (non-SEM) macro image [top image above], it is apparent that wheels of the Chantry Sharpener only produce indentations on each side of the edge.
Knife sharpening is a skill developed through much practice. Because it is a hand operation, each result will be slightly different. It would be interesting to modify a sharpening technique and look at the results in real time. Since knife sharpening produces a lot of “dirt” and SEMs like a clean place to operate, I doubt if this will happen anytime soon.
It would be interesting to look at the same blade sharpened by a variety of knife sharpeners, both human and mechanical. Similarly, it would be interesting to look at different worn edges to better understand what happens with wear. I would also like to look at the effect of steeling a knife edge.
Maybe, if I can convince Mike and my friend to spend time on another round or two of images, I’ll be able to post more observations.

The knife illustrated in the background is a colteli da pasta from Plate XIII in Bartolomeo Scappi’s
Opera di M. Bartolomeo Scappi, cvovo secreto di Papa Pio V. from 1570.